
Feeling a bit let down when you hear your mix on different systems? Especially when you stack it up against the phenomenal mixes of electronic pop and hip-hop maestros like Serban Ghenea and Greg Wells?
Hey, don’t be too hard on yourself! Keep in mind, when you’re comparing your mix to a final product on Spotify or Apple Music, you’re skipping a super important step – the enchanting process of mastering.
While some folks might tell you that mastering simply ramps up the volume to keep distortion at bay on streaming services and vinyl, that’s just a part of the story.
Sure, mastering takes care of the volume, but it also sprinkles a dash of sparkle and buffs your final product to perfection. Imagine what a top-shelf photographer does to a photo – adding a glossy sheen that really makes the genre pop.
And remember, pop and hip-hop mixes each have their own unique mastering style!
I know the feeling. I used to be frustrated that my own music didn’t quite hit the mark when compared to professionally mastered releases. So, I decided to dive head-first into mastering over the past couple of years.
Let me tell you, it’s done wonders for my skills! My clients are excited with the more thrilling mixes they’re getting right off the bat, and it’s helped me craft better mixes that transform into extraordinary masters.
Here are a few nuggets of wisdom I’ve picked up along the way that could give your mixes a little extra oomph. Give some of these a whirl before sending your work off to be professionally mastered, or even just before you send them over to your clients or the artist.
It might just be the difference between a “that’s nice” and a “WOW, I’m blown away!”.
Compression
The secret to making modern and pop productions shine? Effective compression! There are two types of compression that really make modern music pop: VCA compression and Tube compression. (We could chat about this all day, but maybe that’s a topic for another article!)
VCA compressors, usually solid-state and without a tube in sight, are super quick in their recovery stages. They add a clean, yet oh-so-analog charm to the music that’s just delightful.
Personally, I’m a big fan of the SSL G bus compressor and the API 2500 bus compressor.
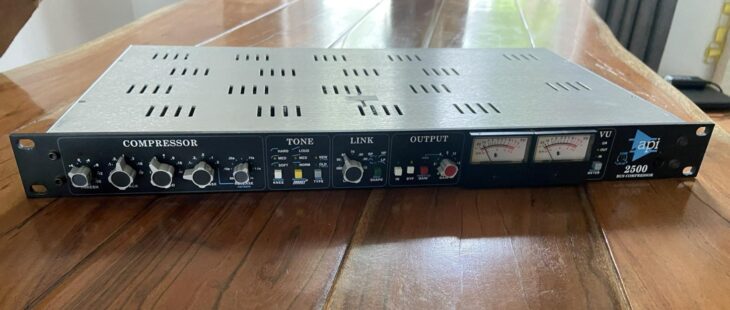
The great news is that both these compressors have been emulated by the awesome folks at Universal Audio and are available in their UAD line of plug-ins!
The SSL bus compressor is a breeze to use and incredibly effective. To clear up a recording, I set it to a slow attack, fast release, and tweak the threshold until the needle nudges above 2 dB of gain reduction.
This method creates a beautiful “glue” for the music—now that’s the magic of legendary compressors! By keeping those low-end peaks in check, you can crank up the volume and really feel the punch that gives modern music its oomph.
The API, while slightly brighter and a tad more complex to use, offers similar perks. But don’t worry, both come with a handy dry-wet mix knob, so you can adjust the effect to your heart’s content.
EQ – Vintage or Modern
When I’m working on mastering, I love using a tube EQ for the high-end and a solid-state EQ for the low end. The Manley Massive Passive EQ has my heart as the greatest high-end EQ out there.

Thankfully, UAD has modeled this to perfection.
As for the low-end and subs, there’s nothing quite like an API 560. It’s got a 31 Hz band and a 63 band, and a little nudge to the right just fills out your beats and your bass like magic.
Here’s a little secret from my personal playbook: I like to put my low EQ before the final bus compressor and my high-end EQ after.
Why, you ask? Well, this way, you can add more low-end and then tame it with a compressor in a really cool way, just like I mentioned above.
It’s a technique known as “frequency compression”, where you dial in specific things you want controlled. Trust me, it really gives your track that extra punch.
Harmonics
Think of harmonics as distortion’s friendly, easy-going cousin. Engineers probably came up with this term to avoid scaring off artists with the word ‘distortion’—nobody wants to accidentally sound like they’re in a heavy metal band, right?
Fun fact, harmonics are involved in every part of the recording chain. The real magic happens when savvy producers and engineers know just how to use them.
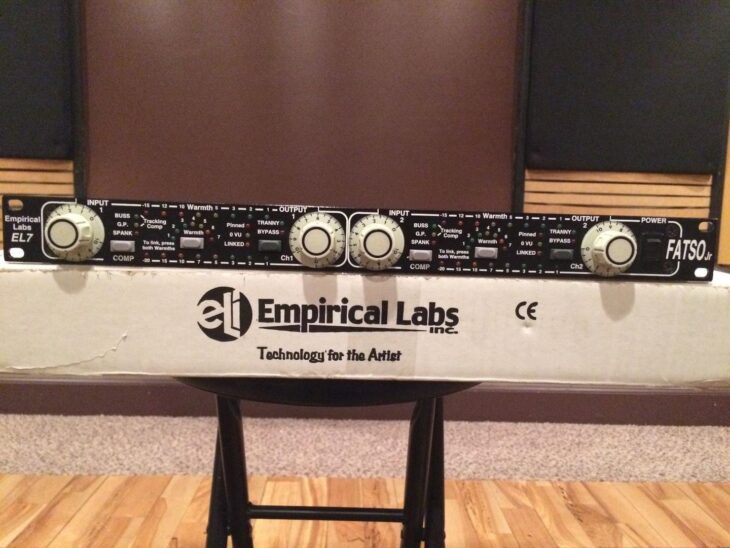
When it comes to my personal favorites for adding harmonics, I’ve got to give it up for transformers and tape. Tape might be a bit harder to come by these days, but that’s where my trusty Empirical Labs Fatso steps in to give me that distinct flavor.
And as for plugins, I’m all about the Slate Virtual Tape Machine.
Now, let’s chat about transformers. The sound you get from Neve? Absolutely unbeatable.
Simply using a Neve preamp—no need to mess with the EQ—and tweaking the transformer input gain can take your mix to another level. The best part? Loads of plugins feature transformers, so there’s plenty of fantastic ones to play with.
If you’re looking for somewhere to start, the Softube Harmonics plugin is worth checking out. And let’s not forget that Universal Audio has done a brilliant job modeling most of the Neve and API preamps.
Stereo Width
Once a secret technique mastered only by top engineers, stereo width has now become a household name, thanks to fantastic mastering software like Izotope Ozone. Pop in your headphones and play a modern record, you’ll notice the sound is not just sound, it’s an experience – grand and expansive.
That’s the magic of stereo width; it gives you this full, spatial sound, making you feel like you’re right in the middle of a concert, even though you’re just listening in good old stereo, whether on your headphones or in your car.
The magic wand is a module hiding in Izotope Ozone’s chain – the Imager module. It’s like a master chef, dividing the crossover points of your entire EQ, separating the bass from the low mids, and the mids from the highs.
It then artfully arranges them from left to right and mid-side, placing your frequencies where they’ll shine the best.
In layman’s terms, this means that the bass usually takes center stage, while the high-end and reverbs get to stretch their legs a bit. Without getting all technical with terms like phasing, it’s crucial to make sure that with stereo width, your bass keeps its punch and doesn’t turn into a muddy mess.
And let’s not forget about making sure vocals, synths, or guitars stand out from each other – we want crystal clear listening, right?
The good news? There’s a buffet of presets waiting for you in Izotope’s Ozone and other mastering software like Slate’s MO-TT. All set to widen your sound to the next level!
Maximizers
A maximizer is like a steadfast brick wall limiter, used to increase the volume of your track so it can hold its own in a playlist or album. You might have noticed that when you’re listening to your new mix along with your favorite artist’s tracks, theirs often sound much louder, right?
When it comes to streaming platforms, there are some rules we need to follow to avoid over-compression. This is where Plugin Alliance’s Metric AB comes to the rescue.
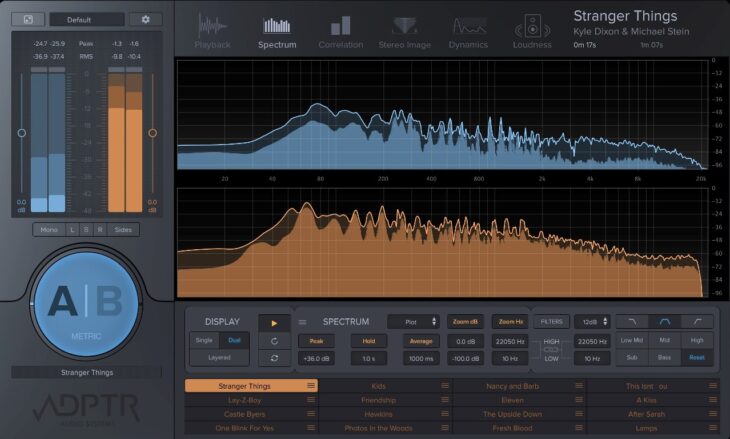
This amazing plugin allows you to load up a song you love and play it side by side with your mix, so you can compare the levels of both.
Think of the maximizer as the last pit stop on your master bus chain before you bounce your mix. Once you’ve set up your maximizer, you can go ahead and insert the Metric AB plugin.
This useful tool lets you compare your mix with your chosen track in real-time, providing a detailed view of differences on an EQ spectrogram and a compression monitor. It’s a fantastic tool for making those final adjustments to your mix.
Final Thoughts
Mastering generally won’t break the bank as much as mixing records, so why not consider sending your work to renowned mastering studios, like Metropolis Mastering in London or Bernie Grundman in Los Angeles?
Now, if you’re mainly looking to wow your artists or clients with the best possible version of your audio for approvals, doing a little something I like to call a pre-master could be just the ticket.
The techniques I’ve shared can really give you a leg up in this respect. Now go win some Grammys!!