So, at the studio where I work, we’ve got a few rooms that are hooked up to a big orchestral-type live room where we can record drums, small groups of strings, or piano.
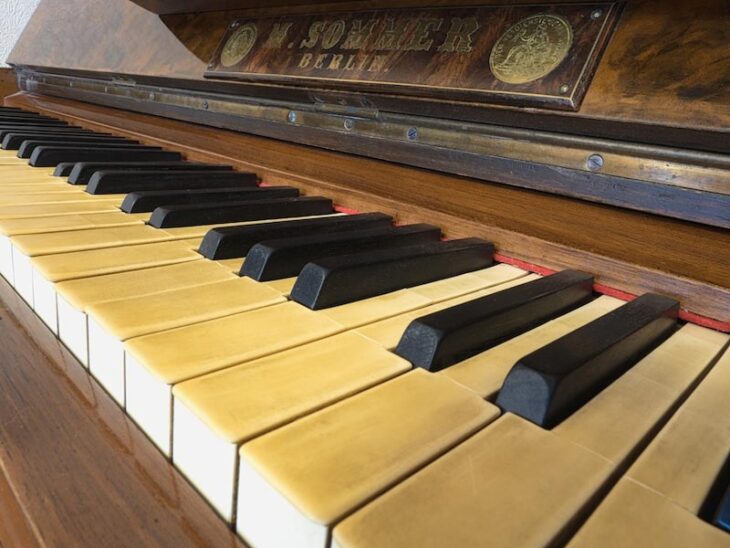
We bought a vintage Steinway many moons ago, and it just so happened to have ivory keys. Most pianos made before 1972, especially those made in the 1950s or earlier, are likely to have ivory keys.
Back in 1972, there was a ban on elephant hunting due to the use of their ivory tusks. This meant that piano makers had to use resin material instead of ivory for their keys.
Using ivory keys on a piano gives it a certain smoothness that is not always present on modern keys. Although I’m glad for humane reasons that the tradition has been discontinued, for those of you that have old-school keys, it’s crucial to take care of them constantly.
Check out below for a step-by-step guide on how we clean our piano in the studio, along with some of the problems we had to learn to fix properly through experience.
Table of Contents
Materials Needed
First, let’s cover the basics of cleaning ivory keys. There is a lot of unreliable information on the internet (and YouTube) about the right way to do it, so I will share what has worked for us. Our studio has been using these methods for years, so you can trust my advice.
It’s not actually that hard to keep ivory keys clean, you just have to do it in the right order. But that’s easier said than done, right?
Here’s what you need:
- Microfiber cloth (super important, don’t just grab any old rag)
- Water
- Mild dish soap (make sure it’s plant-based and fragrance-free)
- A mix of vinegar, water, and baking soda
- Dental floss (yep, you heard me)
- Whitening toothpaste (make sure it’s colorless)
- Whole milk
- Dust off (compressed air)
- Q-tips
- Strainer
I know, it seems like a really random list, but trust me, these are the best products for the job. Ivory keys are delicate, so you gotta be delicate too. We’ve tried out a bunch of different products, and these are the ones that work the best.
The microfiber cloth is super important because regular towels or rags leave behind fibers and lint that can get stuck between the keys and make things worse.
Believe me, you do NOT wanna have to take apart the whole piano to get rid of that gunk (been there, done that). That’s also why we use dental floss to clear out any debris before and after cleaning. It’s a lifesaver (or at least a piano-saver).
Also, use a car detailing microfiber cloth, not an iPad-type cleaner or a cloth for glasses.
Preparing the Piano
To prepare for cleaning and disinfecting your keyboard:
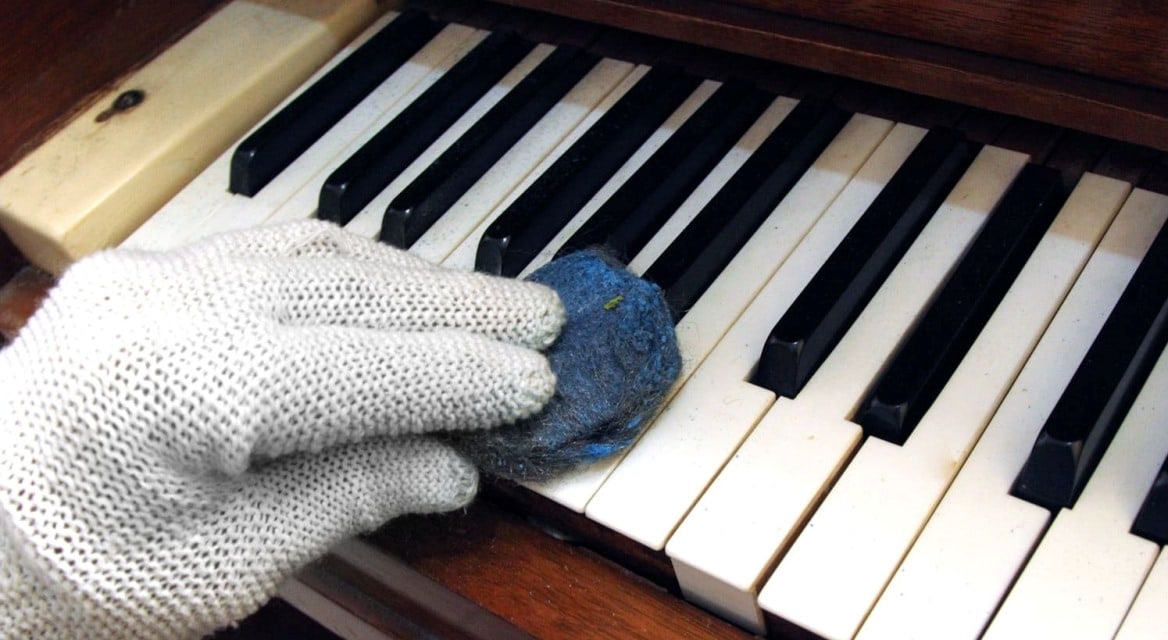
- Use a can of compressed air, like Dust-Off, to remove dust from between and on top of the keys.
- Gently use dental floss to remove debris from between the keys.
- Only the white keys require flossing.
It is important to note that the keys are made of wood, not full ivory. Therefore, it is crucial to avoid getting any water between the keys as well as ensure that dust or heavy debris does not get wet and sink deeper.
Cleaning and Disinfecting
It’s a good idea to clean your ivory keys about once a month if you can manage it. During the pandemic, we also got really serious about disinfecting everything. Honestly, I don’t think we were doing enough before that.
Nowadays, we make sure to disinfect things after every session, or once a month if the piano isn’t getting used much. A lot of folks on the internet will tell you to use rubbing alcohol to disinfect, but I’m not so sure that’s the best idea. After all, ivory is made from elephant tusks, which are kind of like tooth enamel in a lot of ways.
Even though some mouthwashes still have alcohol in them, more and more scientific studies are saying that alcohol can really wear down the enamel.
I’ve noticed the same thing with ivory keys. Sure, alcohol might kill germs, but it puts the natural protective surface of the ivory at risk of getting too thin. That means your keys could end up stained or even cracked. So, my advice? Disinfect first, then clean up afterward. Trust me, your piano will thank you!
Disinfecting
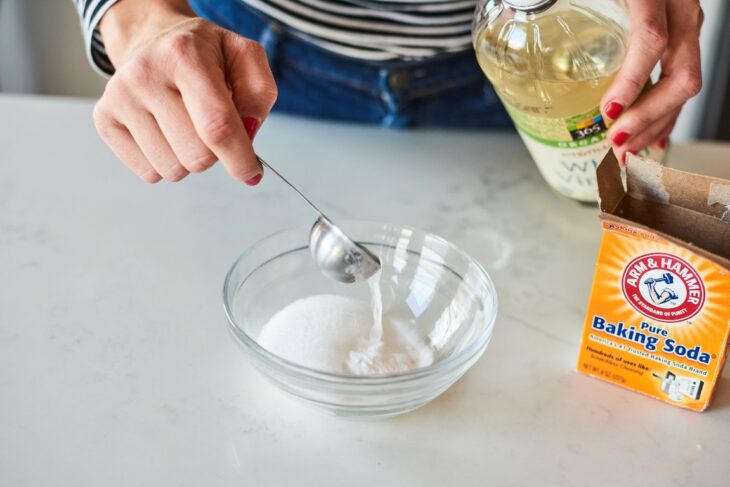
Step 1: Prepare your mixture by mixing white distilled vinegar, a teaspoon of baking soda, and water in a cup. Use 1 part vinegar and 2 parts water.
Step 2: Mix the mixture thoroughly and strain it to remove any lumps of baking soda.
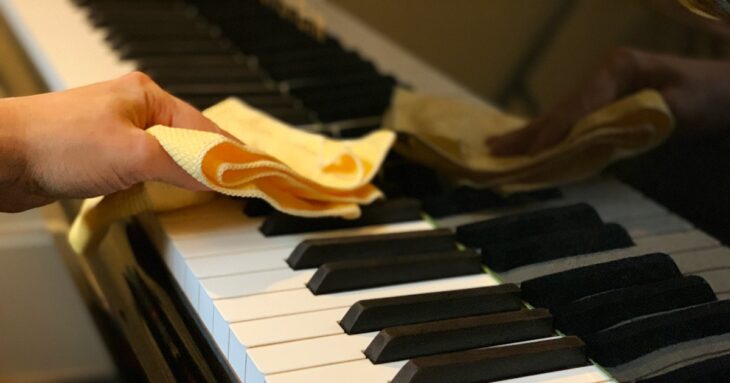
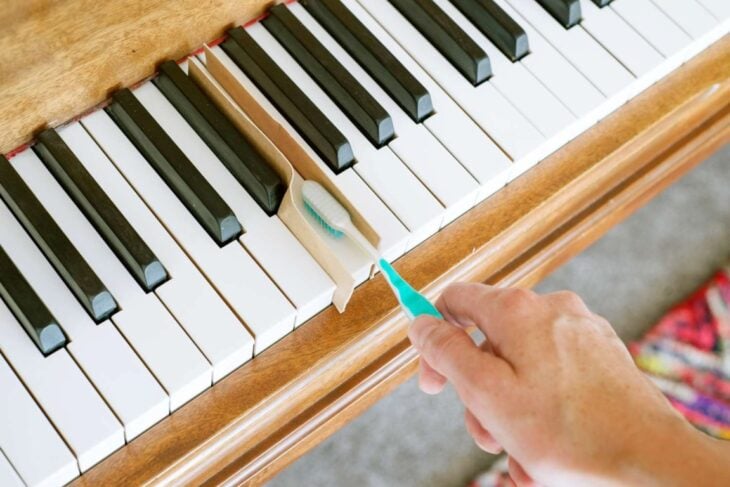
Step 3: Slightly dampen a microfiber cloth and use it to clean the keys from top to bottom. Avoid cleaning in between the keys and only clean the top. Always go from top to bottom as this helps prevent any accumulation near the lid.
Cleaning
Step 1: Make your mixture by adding mild dish soap to 4 ounces of water. We recommend Method brand plant-based dish soap.
Step 2: Mix the solution thoroughly.
Step 3: Slightly dampen a microfiber cloth and clean the keys from top to bottom. Only clean the top of the keys, not in between them. Repeat as necessary.
Step 4: If necessary, use a Q-Tip to wipe moisture between the keys.
Yellowed or Stained Keys
Ivory, like teeth, can become stained over time. You don’t want to go crazy with harsh whitening solutions or bleach, though. While some people have used Crest Whitestrips, that’s not really the best option. Instead, you should use a whitening, colorless toothpaste that protects the enamel or is made for sensitive teeth. At our studio, we use Pronamel toothpaste with whitening action.
Create Your Mixture
Step 1: Combine a small amount of whole milk with a bit of toothpaste in a bowl or container.
Step 2: Mix the toothpaste and milk thoroughly until all the toothpaste clumps are dissolved.
Step 3: Create a separate mixture of dish soap and water in another container. Make sure to exclude the baking soda.
Special ivory scrapers can work, but you have to be super careful using them. Ivory cleaners aren’t recommended since they can be harsh too. If your keys are looking super yellow, you might want to seek help from a piano restoration expert.
Whitening
Step 1: Instead of using a toothbrush, apply a small amount of the toothpaste mixture per key using a microfiber cloth. Leave it on for 5 minutes.
Step 2: Clean gently from top to bottom with your previous water and mild dish soap mixture and cleaning method. The cloth should be damp, never dripping. Avoid using any chemicals, even in soap.
Step 3: Use Q-tips to go between the keys and ensure that no toothpaste residue has gone between them. Depress the adjoining key and use the Q-Tip to absorb any remaining liquid.
Step 4: Ensure that everything is completely dry, especially between the keys. To ensure that no debris has gotten stuck, use floss one last time up and down the white keys.
Sometimes, you might need to repeat this process a few times if it has been some time between cleanings. Always be gentle.
How to Maintain Your Ivory Keys
To keep those ivory keys looking and feeling great, just wipe them down after each session, even if it’s just practice. Sweat and oils can make things acidic and gross, but a quick wipe down and some proper cleaning can really help prevent any damage.
If you really want to keep things pristine, try using a cloth dust cover for your piano. It’s gentle on the finish and can protect your piano from dust and other debris.
Now, I’ve given you some pretty detailed methods for cleaning, stain removal, and disinfecting, but let’s be honest, you probably don’t need to deep clean your piano every month. If you’ve been wiping things down regularly and haven’t been playing too often, you’re probably good to go.
Just remember to keep your piano in a stable environment. Those ivory keys are sensitive to temperature changes, just like teeth. So try not to put your piano in any extremely hot or cold spots.
Lastly, vintage pianos were made by some seriously skilled craftspeople. That’s why they’re so sought after and can last for years and years. So go play!